Showing posts with label sewing. Show all posts

Monday, January 24, 2011

recycled mailer tutorial


These mailers are a great way to use up those pesky grocery bags that seem to pile up so quickly. They're sturdy, water-resistant, and earth-friendly. What's not to love?

{if you're one of those folks who always remembers to take the reusable bags to the store, pat yourself on the back and see if you can get some bags from a friend or neighbor}

Monday, September 6, 2010

Hiya!

It's been a splendid summer here: lots of sunshine and fresh air for the kidlets, and although I've been mostly playing the part of the exhausted pregnant lady, I have managed some sewing and knitting craftiness for a top-secret project (hint: starts with "e" and rhymes with "betsy").


Here's a sneak peek:
This little romper was a pair of buttery soft, but ill-fitting linen women's pants in its previous life. The addition of some happy stripey fabric facing (upcycled again-- woo hoo!), and a cheerful little embroidered bird makes it something special, don't you think?


Oh, and I used these vintage buttons for the straps. (from Etsy seller kikivontiki)

Vintage buttons.... sigh....

Friday, February 12, 2010

Done!

The cookie marathon is over and all of our little goodies have safely made it into the hands of our little friends.


I really wanted to use glassine envelopes for our cookie packaging, but I never remember to order them in time. So we sewed little parchment paper packets instead. I'm pretty much in love with the simple imperfection of them.

But still, if I want to have glassine envelopes in time for Valentine's Day 2011, I think I'm going to order them tomorrow, just to be sure. If I can keep from losing them, that is.

This whole "planning ahead" thing is new to me, but I think I might like it...

(cookie recipe here, royal icing recipe here)

Friday, January 22, 2010

cozy slipper tutorial-- part 2: making your slippers

Hey! If you like these slippers, you might wanna click here, 'cause I'm giving them away...


I hope my pattern tutorial didn't scare anyone away, because we're about to get to the fun part.

But first of all, a reminder: this tutorial is for personal (or charity-- contact me on that one) use only.

Wanna use my tutorial to make these for yourself? Your grandma/sister/b.f.f? Great!

Wanna use my tutorial to make some to sell?
Not cool.

Also, I'd be really flattered if you thought this tutorial was good enough to share. I love it when people link to me! You're even welcome to borrow a picture from the post you're linking to, but please keep my tutorial right here. Thanks, I knew you'd understand.

Now, on to the tutorial...

Here's what you'll need to make your very own pair of custom slippers:

*A pattern (click here for my slipper pattern tutorial)

*Some fabric for each component of your slipper:

-Upper- Mid to heavier weight fabrics seem to work the best: corduroy, denim,
suiting, etc. You could even use a felted sweater, which is what I used in this
tutorial, although it's thickness made it a little harder to work with. If you
want to use a lighter weight fabric, be sure to interface.

So far I've only used recycled fabrics: wool and corduroy from old pants and
the slippers for this tutorial from a felted sweater, so it's hard for me to say
how actual much yardage you'd need. Maybe a half yard?

-Lining- A medium to lightweight cotton. I used a thrifted sheet for this tutorial. Again,
maybe a half yard if you're buying? You'll need enough for two uppers and
two soles.

-Soles- You can use the same fabric as your upper, but if you have mostly hardwood floors
like me, you might consider something a little less slippery. Leather, real or
fake, is great. I used fake leather from an old purse for my poinsettia slippers,
and real leather for this tutorial from some scraps I had laying around.

*Padding (optional): my first few pairs of slippers were unpadded, and perfectly fine. But if you want to kick up the deluxe factor a couple of notches, you could pick up some cheap foam shoe inserts. (I got the most basic Dr. Scholl's inserts at Walmart for $0.97)

*1 yard of 1/4" wide elastic and a safety pin.

*about 2 yards of 1/4" double fold bias tape. You can use store bought or make your own (it's not hard to do!)

*Thread. Matching or contrasting-- whatever floats your boat.


Got all that? Alrighty right. Let's get this show on the road.


Step 1: Cut out your fabric pieces. You'll need two uppers from your main fabric, two uppers and two soles from your lining fabric, and two soles from your sole fabric of choice. Be sure that you don't cut two rights or two lefts. You want one of each, people.

You've got a couple of options here:

You could cut out half of your pieces with the pattern piece right side up, and then flip that pattern over for the other half.

Or, if the size and shape of your fabric allows, fold your fabric in half, right sides together and cut out the pieces for both feet at the same time.

I found it helpful to notch my pattern pieces. I cut a double notch on the "inside" of the soul pattern and the "inside" of the upper pattern, and a single notch on the "outside" of each pattern piece. If you cut these notches in the fabric, too, you'll have an easier time telling your right pieces from your left pieces.

It's probably obvious, but from here on out, you'll be doing each step twice. Once for each slipper.


Step 2: Grab your upper and upper lining pieces for one of the slippers. Lay them right sides together, lining the edges up neatly. Pin along the inside arc. Using a 4/8" seam allowance, sew along the inside arc, back stitching at each end.


Step 3: Trim your seam allowance to 1/4".


Step 4: Clip the inside curve of the seam allowance. Be very careful not to cut through the stitching!

Step 5: Now, open up your fabric at the seam you just sewed and match the heel edges together. Again, right sides together. Pin and stitch, using a 4/8" seam allowance. Don't forget to back stitch!


Step 6: Flip that baby right side out. You should now have wrong sides together and all of your unfinished seams on the inside. Press and pin around the inside opening. (I only bothered finger pressing with the felted sweater.)

Step 7: Sew a casing for your elastic, 4/8" from the inside seam, being sure to leave a 1" opening at the heel.


Step 8: Measure your elastic. I just eyeball it and go for 1 1/2 times the length of the inside curve on a folded slipper.


Step 9: Attach a safety pin to one end of your elastic and feed it through the opening you left in your stitching. You'll have to go through the wrong sides of your slipper to access the opening. Push that safety pin all the way around the casing and back through to the beginning. Remove your safety pin, trim off a little elastic if you feel like it, and sew both end of the elastic together. Hand stitching is probably the easiest way to do this.

Tug a bit on the inside edge of the slipper to pull all of the elastic up into the casing. Stitch your 1" opening closed-- back stitch at both ends.

Now set aside your upper, and pull out your sole pieces...


Step 10: With your sole and sole lining, wrong sides together, pin and stitch around the edges, using a 1/8" seam allowance. (I just follow the edge of my presser foot). Leave a significant opening in the toe area so you can slip that cushioning in.

A word on your cushioning: at this point, cut the seam allowance off of your pattern piece, and use that to trim your shoe insert to size. For compensate for very thick shoe inserts, trim off a teeny bit extra.

Step 11: From this point on, it's easiest to use your zipper foot. Close the opening where you slipped the insert into your sole.


Step 12: Pin the upper to the sole, right sides inside. It's easiest to start at the heel and work your way up both sides before tackling the toe area. Don't fret if you have to pucker the upper a little to make it fit. And if you're working with leather or something else hard-t0-pin for the sole, be sure to use a thimble.

Sew, using a 4/8" seam allowance, then trim your seam allowance to 1/4".


Step 13
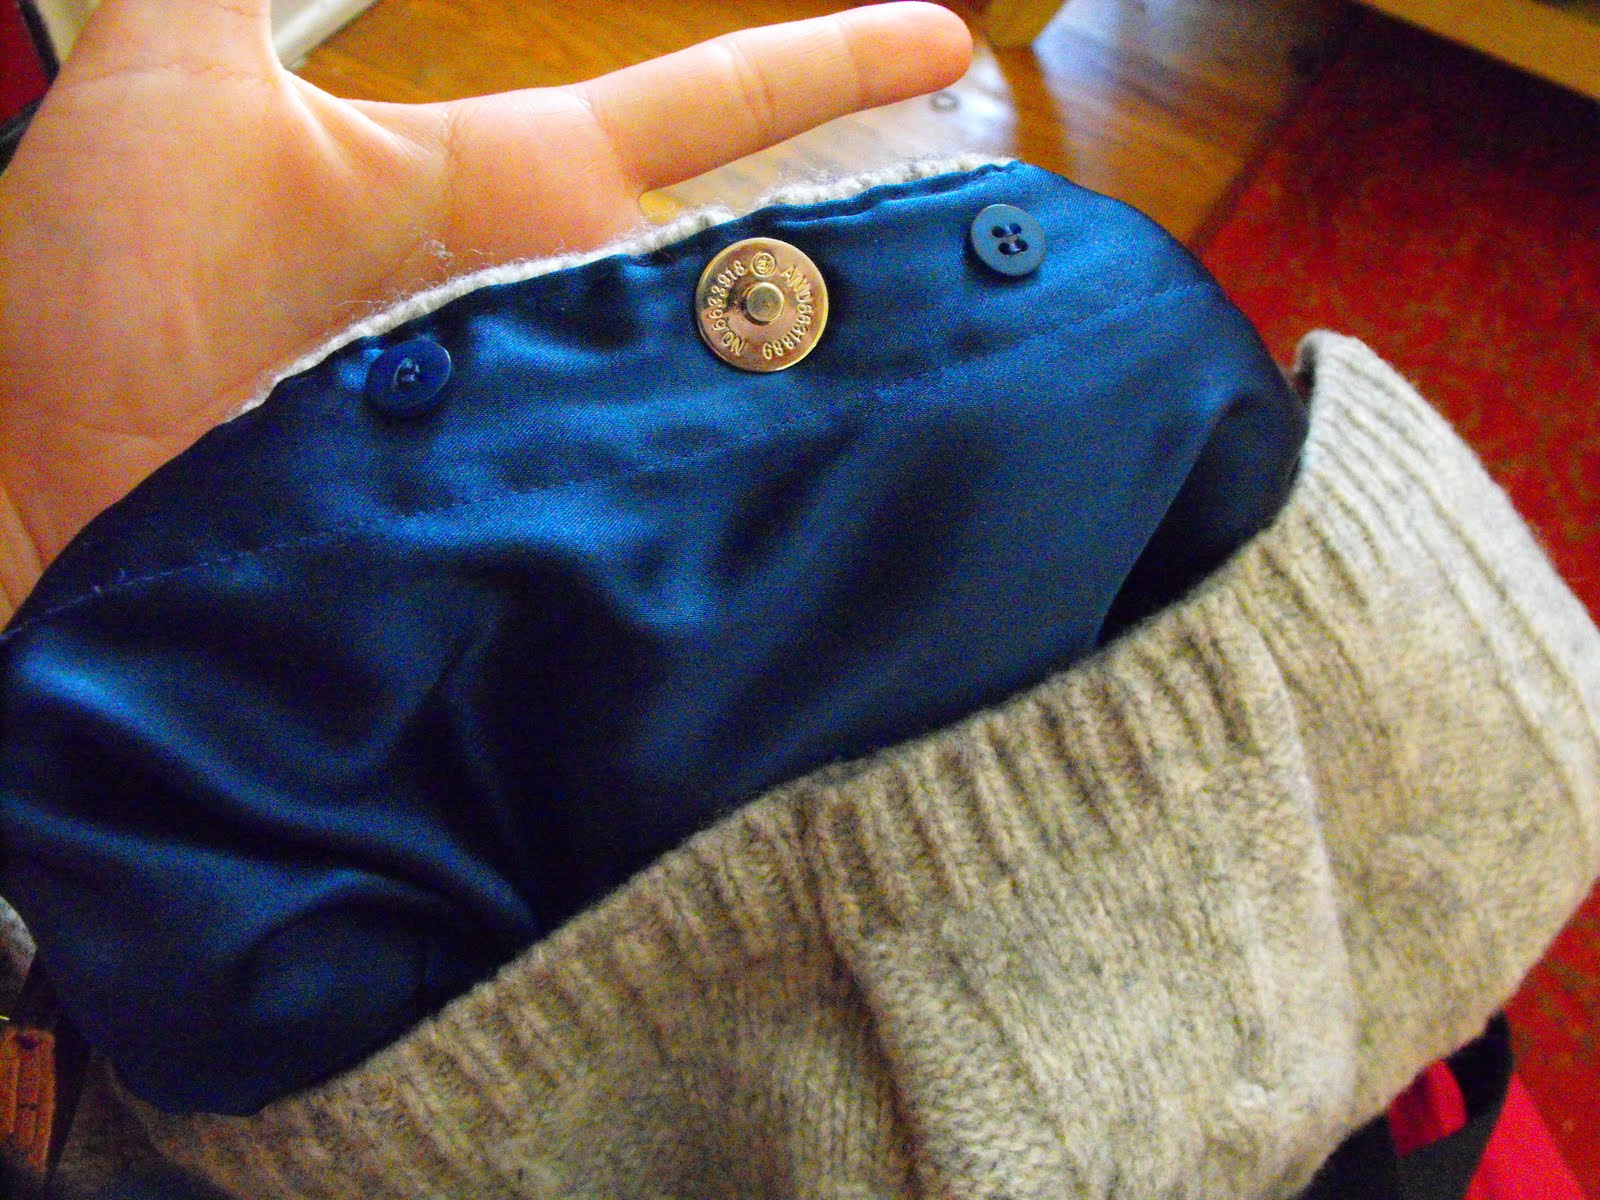
: Open up your bias tape and attach it to the bottom edge of your slipper, lining the edge of the bias tape with the edge of the slipper-- you should have a crease on, or very near your seam stitching. Stitch along this crease. Remove your pins and fold the bias tape over towards the sole, folding the raw edge under at the nearest crease.


Step 14: Use a ladder stitch to invisibly attach the other side of the binding to the sole.

Now pat yourself on the back-- the inside of your slipper is as tidy and lovely as the outside!


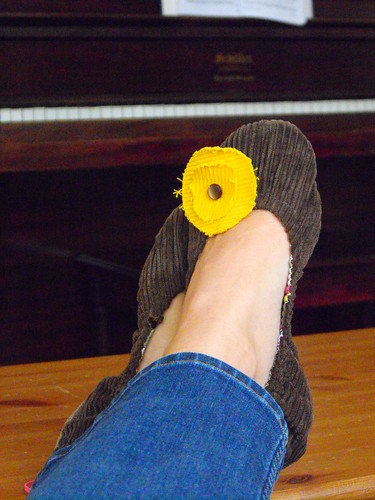
The options for embellishment are (almost) unlimited. For these slippers, I couldn't resist a ruffle. I kind of have a thing for ruffles.

I hand stitched a long straight stitch down the center of a scrap strip of leftover material (about 1" x 6"), anchoring the stitches really well at the beginning. Then I pulled on my thread to gather my strip, anchored it on the other end, and hand stitched the ruffle on to my slipper.

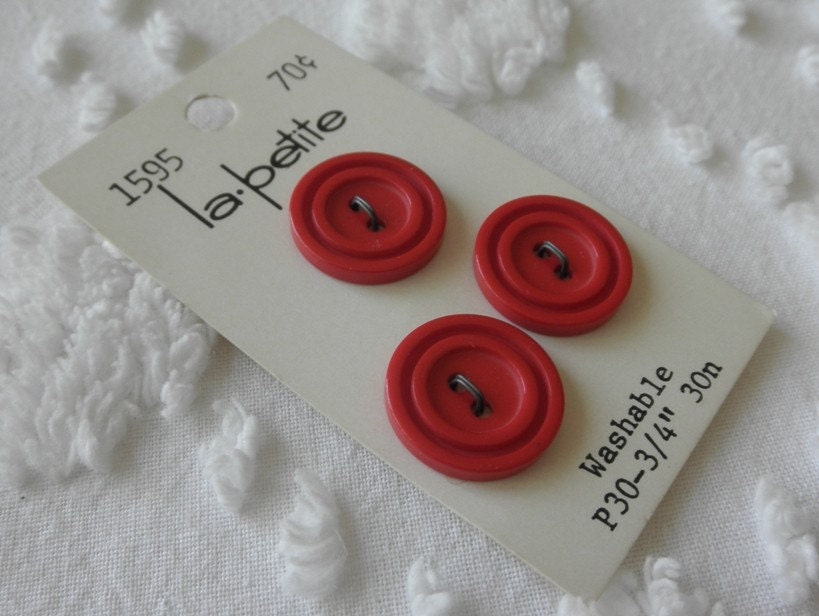
I've also attached flowers to my slippers (pics here and 
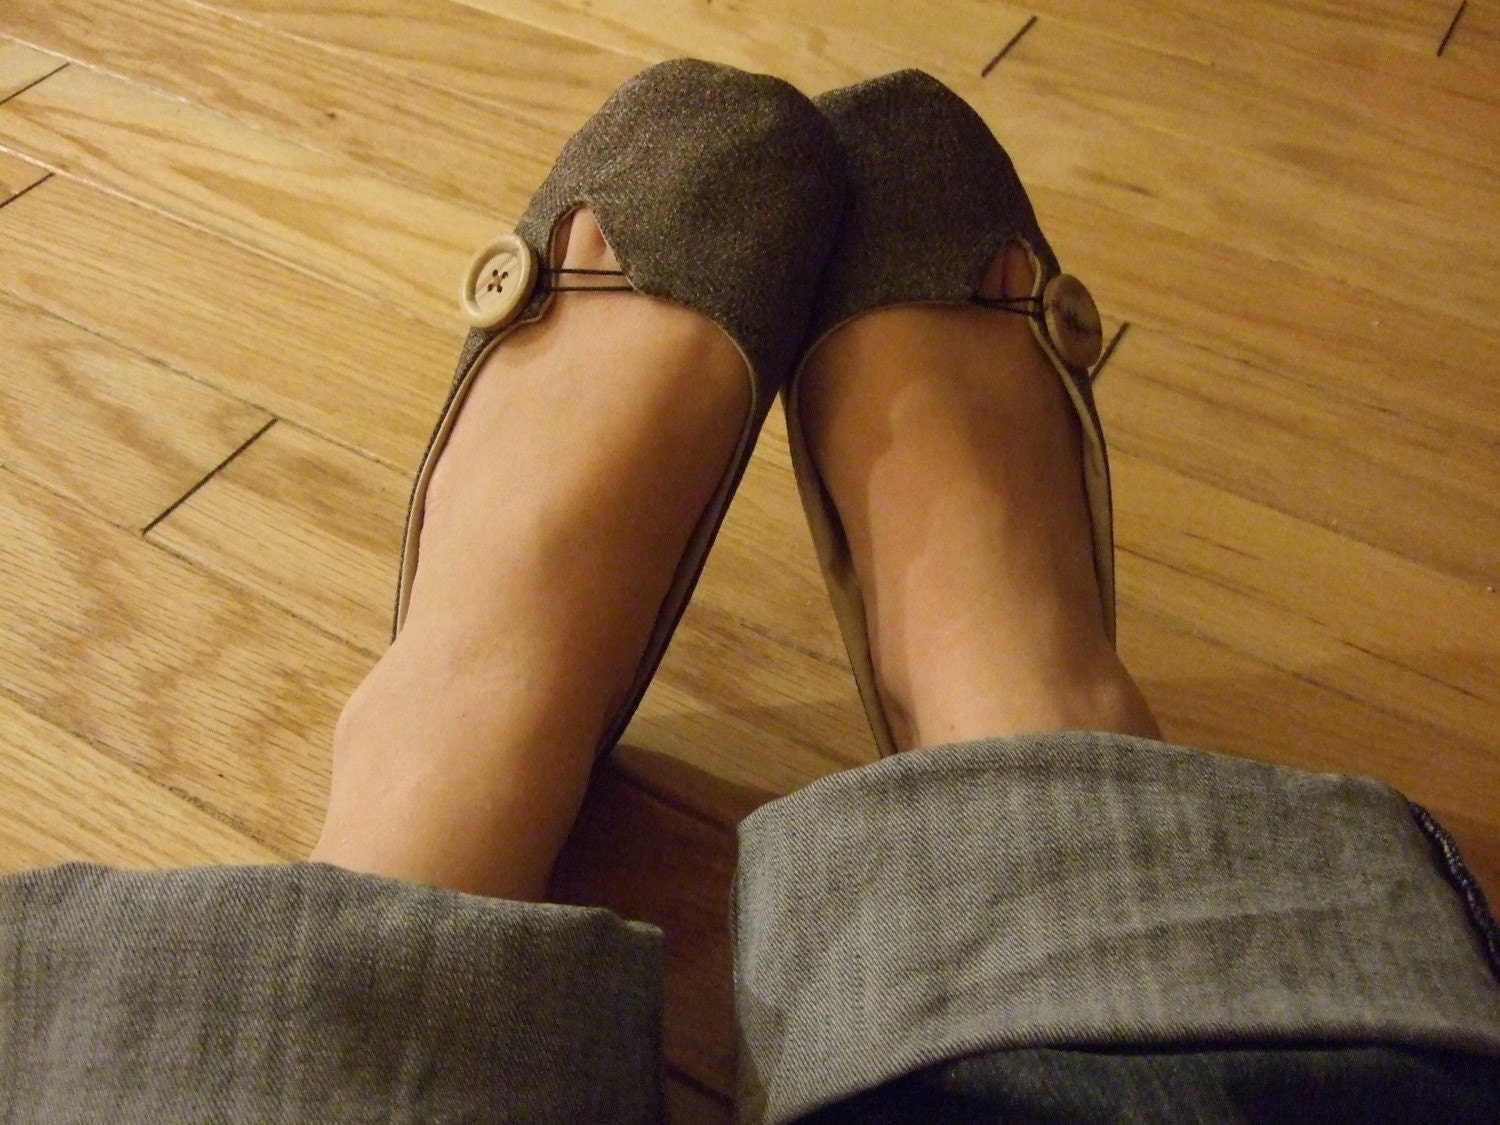
here). I cut out two circles of a contrasting fabric-- one a little smaller than the other. Then I laid the smaller one on top and stitched a vintage button through both circles and the slipper.

I'd love to hear your ideas for other embellishments.

And if you use this tutorial to make some slippers, I'd be thrilled if you sent me a picture!

cozy slipper tutorial-- part 1: making your pattern

Okay folks, I took a stab at a slipper tutorial, and here it goes. Please be patient with me-- I'm a first-time tutorial writer. If you need a little clarification, let me know.

I'm going to show you how to make your very own custom slipper pattern. Are you excited? Well, I'm excited for you.

Here's what you'll need:
*paper for your pattern (the white side of wrapping paper works well)
*3 markers in different colors
*a measuring tape
*washable marker or eye or lip liner (confused? read on.)


Step 1: Trace an outline of your foot. Hold your marker at an angle so that you're slightly tracing under the foot. When you get to your arch, make sure you slide the marker under your foot so that you're tracing against the part of your arch that is touching the ground.


Step 2: Use another color of marker to trace around the original marking (I used orange here). The point here is to smooth out the original tracing and clean it up. You want a nice smooth line all the way around.

Step 3: Stand your tape measure up on it's side and measure all the way around the outline. This is measurement "A". (mine was 23.5") Use a seam gauge or your tape measure to add a 4/8" seam allowance. Trace it on a contrasting color (I used blue-- not pictured above)

Congratulations! You've got the first half of your pattern!

Step 4: Use something washable to mark where you want the upper edge of your slipper to lay on your foot. I used a washable kids' marker, but I just realized that some old eye or lip liner would be much easier to wash off. (or maybe masking tape? I'm thinking now that the marker wasn't such a good idea...)

Step 5: Standing your tape measure on it's side again, measure all the way around the mark you just made on your foot. This is measurement "B". (mine was 16")


Step 6: Measure 1 1/2" down from the top of the arc on your foot. Now, measure the width of the arc opening at this point. This is measurement "C". Now, make a dot on your paper, and make another dot 1 1/2" directly above your first dot. Draw a straight line between these dots. Center measurement "C" over your first dot, perpendicular to the line. Make a mark on each end of measurement "C". Draw a smooth arc between those two marks and your top dot. (in the photo, my arc is just above my big toe.)

Step 7: Find measurement "B" on your tape measure. Then fold the measuring tape in half. Center the fold over the dot at the top of the arc you just drew. For example, my measurement "B" is 16". I'd fold it in half at 8" and center the 8" mark on my tape measure over the top dot. Stand the tape measure on it's side again and shape it to the curve of the arch you just drew, making marks at each end of measurement "B". (at O and at 16" for me). Connect these marks to the arc. you should now have a long "U" shape. This will be the inside curve on your pattern.


Step 8: Measure from the top of the arch on your foot graffiti, over your longest toe (not always the big toe, but it is in my case), to the floor. This is measurement "D". Measure this amount from the top of the arc you made in step 6. Make a corresponding dot on the paper.

Step 9: Go back to the point on your foot where you got measurement "C". At that point, measure from your foot graffiti to the floor on both sides of the foot. These are measurements "E" and "F", respectively. Transfer these measurements to the corresponding points on your pattern. Connect your dot from measurement "D" to these, making a smooth arc. Mark those measurements against your inside arc, all the way down to the ends. You should now have a big upside down "U". Measure around the outside of the biggest arc-- it should be exactly the same as measurement "A". THIS IS VERY IMPORTANT. If it's not, shorten or lengthen the length of your arc until it's right.

Add a 4/8" seam allowance all the way around your "U". Again, use a contrasting color for the seam allowance-- I used blue.

Clear as mud? This is what your pattern should look like


Next up: assembling your slippers!
Thanks for bearing with me people. I hope that wasn't too confusing!

Tuesday, January 12, 2010

corduroy slippers, version 3


corduroy slippers, originally uploaded by snickerdoodledays.

These lovelies came from a hand-me-down pair of men's corduroy pants. I finally managed to come up with a pattern that I'm happy with. Next up, tutorial!

Friday, December 18, 2009

wool slippers, version two.

These slippers went a different direction from what I envisioned when I first started this project, and I love love love them.


They're almost entirely thrifted: the soles came from an old fake leather purse, the black wool from wool pants, the red wool from a felted sweater, and I found the buttons at a thrift store, too. The only thing that wasn't thrifted was the red lining-- it came from some solid colored cotton I had left over from making super hero capes.


Unfortunately for me, they're a little too small (probably better for a size 8 than my 9.5s). Looks like they're going to the gift closet to await the birthday of someone with appropriately sized feet...


And luckily for you, that means that I'll have to make another pair for myself. Translation: opportunity for a tutorial. But it's going to have to wait until after the New Year, cause I'm up to my neck in unfinished Christmas gift projects.

Saturday, November 21, 2009

belated

The curse of the do-it-yourselfer strickes again: I want to make something meaningful, cute, and earth-friendly as a gift for someone I love-- in this case, my sister Erin. So I do.


Trouble is, it gets finished 4 months too late. Her birthday was in July.


Sorry Erin, will you ever forgive me?


All the components for this bag came from the thrift store: a cable-knit sweater that I felted, a silky polyester blouse (for the lining), and a thick braided leather belt. Oh, and the magnetic snaps came from an old purse I've had for years and recently started cannibalizing for parts.


The hem of the sweater became the top edge of the purse. I left the buttons on the blouse-- thought they'd be a cute reminder of the origins of the purse.


Minor detail: I still need to take it to a shoe repair shop to have the strap sewn on. If you look closely at the second picture, you'll see a pin poking out. Yikes! I purchased leather needles for my sewing machine and got one in and ready to go, only to find that my presser foot won't lift high enough to get a few layers of sweater and leather in there. So, the the shoe repair shop we go...


But I'll have it done this week Sis. Cross my heart and hope to die.


Thursday, November 19, 2009

prototype

I've had my eyes on these slippers for a while now. Aren't they just lovely?


From Etsy's HydraHeart


I've been entertaining myself during baby Jack's 2 am nursings lately imagining how I'd make my own version. I didn't have cute wooden buttons, or black elastic, but I did have these:


A pair of soft black wool trousers that someone forgot were dry clean only. Can you see the lining peeking out the bottom? That cracks me up for some reason...

They were free to me. My mom runs a tiny little community thrift store and saved them for me because she knows I like felted wool.

Yeah, she's the best mom ever.

Anyways, here's my first try-- to test the pattern I made up:


I used two pieces of ribbon to tie my keyhole. Cute, no?

For version two, I'm going to do a few things differently:

*I won't include a seam allowance this time around-- the wool I used has just a little stretch to it and I want them tighter.

*I'll move the keyhole closer to the front of the slipper.

*If I feel really ambitious, I'll add a layer of interfacing-- to give them just a bit more structure

*I'll find something non-slip for my soles.


Stay tuned for take two...


P.S. My sincerest apologies for the filthy mirror. It belongs to baby Jack. He likes to lick it.

Wednesday, November 11, 2009

pink refashion

Back in early June I was in desperate need of a blouse to fit my 2 1/2 months postpartum body. I was so done with maternity clothes, but most of my regular clothes didn't fit yet, and I had a wedding to attend.

I found a pink men's dress shirt at my favorite thrift shop's semi annual 50% off sale-- they always have a lot of pink men's dress shirts for some reason.


Before


Anyways, I had a time crunch and no pattern (and, you can see, a sink full of dirty dishes), not to mention the fact that I was a bit hormonal-- a recipe for a fine sewing experience, don't you think?


I chopped off the sleeves (saving them for later) and took in the sides-- in an effort to get a somewhat more feminine fit. The acrobatics involved in trying to fit myself were probably very amusing. (side note: I recently ordered a kit for a My Twin Dress Forms-- I'll let you know how it goes)


half-way there!

I also unpicked the collar. Then I sewed up the new side seams and threw in a few haphazard darts. I re-attached the (now shortened) sleeves, and in the highlight of the entire project, learned how to use the rolled hem attachment on my sewing machine to finish the sleeve edges before attaching some lace trim (also thrifted).

The fit ended up being too wonky for me to be thrilled with the outcome, but I like it enough to wear it frequently-- even 5 months later.


after

(many thanks to my four year old photographer)


Cost: $2.50
Time: Way longer than it should have-- I worked here and there over the course of
two days.

Tuesday, November 3, 2009

more ruffles!

I turned these:
(a couple of shirts I rarely wear. One with a high, unflattering neckline, and the other with a big hole.)


Into this:
(a shirt that I can already tell I'll get a lot of use out of)

I used a shirt with a neckline that I like as a template for a new neckline on the off-white shirt, and then cut the white shirt (the one with the hole) into 2 inch wide strips. I sewed those strips into one 104" long strip, sewed a row of gathering stitches 1/5" in from each long edge. Then I gathered them up and sewed them on to the off-white shirt.

This was a little harder than my last ruffle shirt-- since the double gathered strip was a lot more fiddly to get looking nice. And my kids were distracting me when I was cutting the neckline (has the halloween sugar hangover and the time change been a double whammy for anybody else's kids?), so it's a little off center.

Oh well.

I think this is a big improvement over the originals, no?


Time: 1 1/2 hours
(but mostly because my kids were being needy. If you don't have any or they're sleeping or busy with something else, you could probably get it done in half the time-- and do a better job than I did!.)

Cost: FREE!!

Saturday, October 31, 2009

Halloween 2009: Dinosaurs

My kids are big fans of PBS's Dinosaur Train. When I came across a free pattern for a Buddy costume, they were thrilled. We all loved how they turned out. If you're planning ahead for next year and you've got a dinosaur lover in the house, you'll want to bookmark this website.

ruffle me happy

Ruffly shirt refashions have been all over the crafty blogosphere lately. Since I had the sewing machine out and warmed up from sewing Halloween costumes, I figured it was high time I had a whack at a ruffly tee of my own.

I'm definitely going to be making more of these lovelies.

This was the easiest shirt refashion I've done so far:

I started with two ill-fitting orange t-shirts. The first one got nipped in about a half inch on each side and I changed the round neckline to a V-neck.

I cut two 3" wide strips out of the second shirt, sewed them together, gathered them, and stitched them on to the first shirt. Voila!

Time: about 30 minutes
$$: FREE!! The shirts were hand-me-downs from a friend (thanks Shauna!)


Friday, October 2, 2009

Ridiculous

I refashioned another shirt yesterday and I love it. It was so quick and easy to whip up and turned out so stinking cute that it's downright ridiculous. Absurd, really.


I started with a plaid men's shirt. I forgot to take a before picture, so you'll just have to trust me on this. Speaking of pictures, please excuse the photography here. I was too impatient to wait for someone to take a picture for me that I hopped up on the coffee table for a DIY picture with the help of the mirror that sits on my mantle. My four-year old kindly pointed out that we're not allowed to climb on the furniture in the living room. Oh, the hypocrisy!!


Where was I?


Oh yeah: Loosely following instructions from the tutorial at My Mama Made It, I cut a new neckline and shortened the sleeves. I gathered the neckline and bound it with some (pre-made) bias tape instead of using elastic. Then I made a little pleat at the bottom of each sleeve, and bound the sleeve edges in bias tape too. I had a bit of bias tape left, so I made a bow. It's safety pinned on for now, but I'll tack it on with some thread when I get around to it.


Let me just take a moment here to sing the praises of bias tape. I haven't used it much, but sewing this shirt might just be the beginning of a long and rewarding love affair (with bias tape, of course). It's a great way to add visual interest and is so much easier than hemming raw edges (especially curved neckline edges).


I used store-bought bias tape for this project, mostly because I was in need of some instant gratification. But did you know that it's easy to make your own? Just think of the possibilities!


Total time: abt. 35 minutes


Total cost: $3.00 (thrift store shirt) + $1.50 (bias tape)= $4.50


And that, my friends, is ridiculous.


Sunday, September 20, 2009

my favorite sheet skirt

My baby sister turned 13 this summer. Isn't she all grown up and lovely? Look out world!


Being a big sister who is either (a) super cool or (b)totally out of touch with teenage fashion, I made her a skirt out of a thrifted sheet and pillowcase.


I kind of winged (wang?) it here, using a readymade skirt I already own as a basic template: pleats, a side zipper and waistband and hem border out of contrasting fabric (the pillowcase).


The photos here don't even begin to do this baby justice. The floral fabric is a lot more vibrant-- the leaves are actually the same color as the border and the flowers aren't so washed out in real life. And if you look really close, there are even tiny butterflies and ladybugs hiding amongst the flowers.


I might, just might have enough of these fabrics left to sqeeze out a skirt for myself. Crossing my fingers...

Friday, May 29, 2009

shirt refashion


I found this men's dress shirt at the Saver's 50% off sale on Monday. The light blue fabric has tiny white stripes in it-- perfect for a summery blouse. It was a pretty easy refashion-- I cut the collar off, added an inverted pleat in the back to make the shoulders sit properly, cut the neckline and added pleats in the front, chopped and gathered the sleeves, and shortened and hemmed the bottom. (used this tutorial for inspiration).

It took me the better part of an afternoon, but that's because I had to take lots of breaks to take care of kids, feed the baby and do laundry. But really, it's practically an instant gratification project. Who doesn't love instant gratification?

I decided that I like refashioning a whole lot better than sewing from scratch. Call me crazy, but brand new fabric and a pattern make me feel pressured. Like the they're telling me, "You've only got one chance to get this right!!" (what? doesn't your fabric talk to you?) Refashions are so much more forgiving-- I like making up the rules as I go along, and taking things apart to refashion them is teaching me more about sewing than any pattern ever did.

I've got three more shirt refashions waiting in the wings. Next up, a pink men's shirt into a feminine blouse.

P.S. please excuse the blurriness of the after picture-- I used a four year old photographer.

Saturday, May 16, 2009

sheet alchemy

I love thrift store sheets. They come in all kinds of great patterns and they're nice and soft by the time they get to me. And it's a huge amount of fabric for cheap! Here's what I've made so far:


My very first sheet skirt (sewn last summer). I used the existing hem, sewed a seam up the side and made an elastic casing for the waistband. It took all of 35 minutes to whip up. It's not terribly flattering, but I figure it's the skirt equivalent of sweats-- so comfortable and much better looking. Oh, and that stretchy waistband meant I could wear it as a maternity skirt.


My second sheet skirt, first wrap skirt (sewn last summer). This one was a bit of an experiment. I didn't use a pattern. I traced the outline of a skirt I already have and love and cut out panels and a waistband/tie. Hemming was a pain, because the bottom somehow ended up curved.


My most recent (and favorite) skirt. I squealed with joy when I saw this poppy sheet at Saver's. Nobody else was interested, but I would have wrestled an old lady for it if I had to. I used this pattern. You have to buy an online subscription to Craft magazine to get the instructions, but the pattern is available online for free. If you print out the entire thing, it'll take 49 pages, but you'll get patterns for two variations on the skirt-- a beginner version (that's what I made) and a slightly more advanced version that uses a button closure and is edged with piping. (pictures of both versions here)
It was pretty easy to figure out without the instructions, but I did miss one important thing: the pattern is drafted for someone who has a 30" waist, and as you can see here, I don't (and I apparently need to get my hands on some Spanx...). There are special lines marked on the pattern that can be cut and used to enlarge it. Since I skipped that step, I had to add an entire extra panel. It worked out fine, but next time I'm going to cut and enlarge. Oh, and I(heart)rickrack. And did I mention that IT'S REVERSIBLE?


This is side 2 of my reversible skirt. My mom snatched that sheet up from her tiny community thrift store in Warren, IN. She intended it to be a curtain for the boys' book nook, but I stole it (sorry boys!) for my skirt.


And last but not least, Amy Butler's Anna Tunic. I think it makes me look somewhat matriarchal, but that might have more to do with my nursing-enhanced bosom and less with the tunic. I wish I'd made it just a titch longer, but that's not really a big deal. It's also fully lined, which makes for a lovely finished looking inside, but it also makes for three layers (including the t-shirt I wear under it)-- a little much for hot summer days.
No more skirts planned for the time being, just some cafe curtains for my kitchen (from a sheet, of course!). But Saver's is having a 50% off sale on Memorial Day, and I might just find more sheets begging to be something cute.


Friday, April 17, 2009

refashionista


I come from a family of recyclers. The Depression-era saying "Use it up; wear it out; make it do, or do without." could be our family motto. Heaven forbid we throw away a zip-lock bag after using it only once (or twice, or three times!), or throw compostable food waste into the regular trash. I cloth diaper my babies, for Heaven's Sake!


And thrift shopping has long been one of my favorite past times, long before it was fashionable, as a matter of fact.


Knowing this about me, it's no surprise that I fell in internet love with the blog Wardrobe Refashion. I've been lurking there for a while, soaking up all kinds of refashioning inspiration and finally decided to take the plunge. I pledged (starting May 1st) to abstain from buying new clothes for the next 2 months. I can buy handmade (Etsy included-- yay!) or thrifted clothing, as well as sew or refashion clothing items myself. Click here to read the official rules.


So, inspired by the fabulous refashionistas at Wardrobe Refashion, I made Jack's blessing outfit out of two of Joe's old white dress shirts. It turned out really well. See for yourself.


Next up, easy breezy wrap skirts made out of nifty thrifted sheets.