Showing posts with label thriftiness. Show all posts

Thursday, November 10, 2011

the 7 month sweater (a cautionary tale)

My dear darling neighbor was expecting a baby last March.

In February, I decided I wanted to whip something up for that sweet little addition to our neighborhood.  By the time little B.W. was born, I had the body of a very adorable sweater, but no sleeves.

Fast forward 7 months...

I finally had those sleeves knitted on, added the button bands, sewed in the loose ends and attached some buttons. B.W. was 6 months old and growing bigger every minute. Better late than never, right?

Fortunately I'd long since learned my lesson about knitting newborn sized things. That lesson, by the way, is don't. Teeny tiny newborn sized things are oh-so-adorable, but they'll also be oh-so-unwearable after about two weeks what with the way those little beings grow like weeds. Baby will get far more use out of a 12 month sized item than a newborn item. 

Do not be seduced by the adorableness of teeny tiny itty bitty!!

But I digress. Where was I?

Oh yes, 6 month old baby got the sweater, which happens to fit perfectly. Phew!


Pattern: Little Coffee Bean Cardigan Oh how I love this (free!) pattern. It's so well-written and versatile.

Yarn: Recycled from a thrifted merino/cashmere blend sweater. It was all originally blue, but the green stuff was dyed with food coloring (a remarkably satisfying experiment that I documented here)

Cost: 
Yarn: about $3.00
7 months of my time: about $47,040
Total: the most expensively awesome baby gift ever.

Monday, January 24, 2011

recycled mailer tutorial


These mailers are a great way to use up those pesky grocery bags that seem to pile up so quickly. They're sturdy, water-resistant, and earth-friendly. What's not to love?

{if you're one of those folks who always remembers to take the reusable bags to the store, pat yourself on the back and see if you can get some bags from a friend or neighbor}

Wednesday, January 12, 2011

a little January cheer

Here's what's making me happy on this gray January day:

The memories of yesterday's perfect apple pie.
(seriously, I'm kind of tempted to make another and enter it in the county fair)
(yes, you should make one too. just do yourself a favor and use this crust.)


A thrift store treasure I picked up last week


My annual Christmas present to myself: watching the growth of my cheerful amaryllis.


Also: playing Legos with my six year old birthday boy and making yet another chocolate cake with caramel icing.


What makes you happy today?

Tuesday, January 4, 2011

DIY microwave popcorn

We love popcorn. In fact, we're downright crazy about it here.

I grew up with an air popper, and have fond memories of watching fluffy popcorn burst out into the bowl.

Today I live in a little tiny house with a little tiny kitchen, and we don't have room for superfluous kitchen appliances, so the air popper had to go. For years now we've been popping our corn on the stove in a big pot, but today I was in the mood for experimentation.

I remembered reading a tidbit in a Cook's Illustrated magazine a while back about popping bulk popcorn in the microwave, and figured it was worth a shot.


I dumped a handful of popcorn kernels into a brown paper lunch bag...


... put another bag over the first, like so...

(pardon the sideways shot, I'm trying to blog and nurse a baby at the same time)

...then I put it in the microwave for about 4 minutes, aaaaaaand:


The results were awesome. Mind-blowingly awesome

Seriously, judging by my sister's reaction, you'd have thought I'd turned those kernels into white doves or something. All afternoon, she kept shaking her head and saying, "I just can't believe you did that!", and "It's really that easy-- Ha!"


Some things I learned from my little experiment:

Oil isn't necessary to microwave pop. In fact, the lack of it seems to keep the popcorn from burning. Some of those kernals were in the microwave for more than 6 minutes, and none them were the least bit scorched.

However, Oil might aid the cooking. I ended up with more "old maids" than I'm used to, and when cooked this way, the kernels took longer to pop than they do with standard store-bought microwave popcorn.

Bags can be reused many times. And, although I haven't tried it yet, I imagine this would work just as well with a bowl and some loosely-applied plastic wrap (or other covering).

Friday, December 10, 2010

dyeing yarn with foodcoloring: color good enough to eat

I've been experimenting with yarn and my crockpot and some Wilton's food coloring gel lately. This is what I came up with:

I started with natural, off-white wool that I harvested from a soft, lovely United Colors of Benneton sweater I purchased for $3 at Saver's. (come back tomorrow to read a funny story about the unraveling) I was going for a coral color-- I used some rose pink and just a little bit of yellow. I ended up with something more salmon, but for a first try I'm absolutely thrilled.

This method was really easy, and I can't wait to try it again. I followed this great tutorial. There's also a group on Ravelry, What a Kool Way to Dye, that is "for those of us that get our yarn dye in the dessert and drink aisles". The pages there are full of lots of great information and inspiration.

If you're not already on Ravelry, by the way, you should join. Right now. (it's for crocheters, too!)


And here's my salmon yarn knitted up. It's combined with undyed yarn from the same sweater for a stripey pattern. I'm making this little hat and I'm already completely smitten.

This picture illustrates one of the funny things about dyeing fiber blends-- the different fibers will absorb the colors differently. This sweater was a merino wool and angora blend. If you look closely, you can see a bit of a pink haze (esp. in the upper left corner). That's because the angora took on more pink, and the merino took on more yellow. So really, the whole process is part science, part magic, and frequently a little surprising-- my favorite kind of crafting.

Saturday, October 16, 2010

more thrifty gifting

After my post on recycled baby sweaters, it occurred to me that I've got a few other thrifty gift ideas up my sleeve.

My niece is going to become a big sister any day now. The new baby needs a sweater (of course!), but we didn't want the Big Sis to feel left out of the gifting.

For her gift, we cut shapes out of brightly colored foam sheets to use as bath stickers. My boys have been playing with a set of our own for the past few weeks and bath time has never been so much fun. We got a huge stack of the foam sheets for about $4, and used 6 sheets of foam for the gift, so we ended up with a gift that cost pennies, but is as much fun as toys that cost more $$ . (we borrowed the idea from this wonderful post at FilthWizardry)

Incidentally, these foam "stickers" don't have to stay banished to the bath. They also work really well on windows, dishwasher doors, refrigerator doors, etc.-- just keep a dish of water nearby! A handy way to keep little hands occupied while you're busy in the kitchen, no?


I loved playing with paper dolls when I was little, did you too? It was a happy little trip down memory lane when I stumbled across this lovely collection of free vintage paper dolls.

They seemed the perfect birthday gift for one of our favorite little neighbor girls. We printed them on heavy cardstock and covered them with clear contact paper to help them last a little longer. I downloaded some free pretty wallpaper from lovemae to make the storage envelope, and we had a sweet little gift for nothing more than the cost of ink and paper.

If I did it again (which I'm sure I will), I'd print them a little smaller and mount the doll and dresses on thin refrigerator magnets (the kind that come covered with advertisements for plumbers and dentists), and store the whole lot in a recycled candy tin for a fun and handy travel toy.

For a more gender neutral gift along the same lines, check out these awesome slotted building discs from madebyjoel. Really, go check it out right now. You'll find an incredibly inspiring blog with oodles of beautiful ideas for fun toys you can make for and with your kids. (I confess to spending a weekend reading through his entire blog after I stumbled across it-- it's that good)

What about you? Do you have any great and inexpensive gift ideas?

Thursday, October 14, 2010

Yarn Harvesting

This may be a minor exaggeration, but it feels like our circle of family and friends has been producing a couple of newborns a week lately. I know this is a case of the pot calling the kettle black, since I too happen to have a bun in the oven, but see, I firmly believe that those new little bundles of wonderfulness need cozy warm sweaters and it's my calling in life to make sure that happens for the babies. At least for the babies I know. And at the rate we've all been going, my formerly healthy stash of baby sweaters has been reduced to zilch, zero, nothing.

So will everyone I know please stop procreating long enough for me to rebuild my stash of baby sweaters? I'm not asking much really, I only need a couple of weeks. Thanks!

Whenever I need to embark on a baby-knit-a-thon, I get busy harvesting yarn from thrift store and/or hand-me-down sweaters. It's a great way to get wonderful, soft yarns at an unbelievable price.

A couple of teeny tiny sweaters worth of super soft merino wool yarn for $2.50?

Yes, please.


{a lovely cashmere-blend sweater with a funky fit: perfect for reincarnation into something baby-sized}


{The newly unraveled yarn enjoying a nice warm bath}


{drying and de-kinking}


{and finally, reincarnated as an itty bitty sweater}

This, by the way, is the very best yarn harvesting tutorial I've ever come across-- and I've read lots of them. You'll definitely want to check it out if you're at all curious about the process.

Dawn, the woman who wrote the tutorial knows what she's talking about; she does good business selling recycled yarn in her Etsy shop, TwiceShearedSheep (she also sells some lovely stitch markers that I've been drooling over lately). I think it's incredibly generous of her to share her knowledge.


(I'm not in any way connected to the shop, incidentally. Just passing on some link love in gratitude for her great tutorial.)

Thursday, July 1, 2010

because we can always use another free vase...

Method used to package their handsoap refills in large teardrop containers. Turns out they make lovely vases-- all it takes is a quick lop off the top (I used my Dremel).

I love design that lends itself to reuse. Unfortunately, they've changed their refills to less-lovely pouches. Makes me sad, but they probably have a good reason for it.


The recycled vase was clearly not an original idea from me. Don't you just love that they provide recycling ideas?

**Update: a Magic Eraser sponge and a whole lot of elbow grease will remove the printing from plastic without scratching.***

Monday, February 1, 2010

Lentil Shepherd's Pie

my precooked lentil shepherd's pie


Mr. Snickerdoodle recently decided that he's going to live to be 100, so we're cutting down on the meat around here, . After being introduced to Erin's lentil tacos recipe, I've started looking for other recipes in which a lentils substitution would be passable.


Shepherd's pie is one of our go-to casseroles here in the Snickerdoodle household. It's cheap, easy, and I usually make two at a time: one for now and one to be frozen for when we're busy busy.


Yes, it's humble. No, it's not foodie food. But it feeds the masses and that's what counts with a house full of little ones. And now it feeds the masses with less fat and more fiber!


Lentil Shepherd's Pie

3/4 c. lentils (rinsed and checked for debris)

1 medium onion, diced

1 clove garlic, minced

1 Tbsp. olive oil

2 tsp. beef base (or maybe vegetable base if you are a real vegetarian)

1 quart water


1 can cream of tomato soup (not reconstituted)

3 cups (or however much you want) of your favorite vegetables-- we use frozen green beans
and corn. If you're using fresh veggies, you'll probably want to precook them.

4 cups (or more if you feel like it!) of mashed potatoes

CHEESE!!! (if you want it, grated-- cheddar is our shepherd's pie cheese of choice)


Heat the oil over medium heat in a large saucepan. Saute the onions until soft and translucent, add garlic and cook until fragrant, about 30 seconds. Add lentils, water and beef base and cook until the lentils are tender. (30-40 minutes) Combine cooked lentils and tomato soup concentrate.


Place vegetables in a medium sized casserole dish (mine is 2.75 quarts). Pour the lentil mixture over the veggies, and spread mashed potatoes over the lentils. Top with grated cheese-- 3/4 c. suits us just fine. Bake in a preheated 350 degree oven for about 20 minutes, or until the cheese is melted and bubbly and the vegetables are heated through.


The verdict: Split. I actually prefer this version. Mr. Snickerdoodle prefers the original-- it's a texture thing for him.


Thursday, January 28, 2010

baby food love

(yellow: spaghetti squash, tan: quinoa pilaf)

We don't buy special baby food for Jack, except for when we go on long family road trips. It's just so easy (not to mention cheap!) to make our own.

Usually that involves grinding whatever we're having for dinner up in the baby food mill-- would you believe that the kid loves curry?

When I've got a little extra time, I also puree batches of various fruits, veggies and cooked grains and freeze them in ice cube molds for a quick and nutritious baby-ready food.

Tuesday, January 26, 2010

Recipe of the Week: Citrus Pork with Egg Noodles


image via Simply Recipes


File this recipe for Citrus Pork with Egg Noodles away under cheap, quick, and very very tasty. I confess to scraping the last bits of sauce from the serving dish after dinner last night. But shhhhh, don't tell anybody...


(we skipped the egg noodles and served ours over a bed of brown rice)


Tuesday, January 12, 2010

corduroy slippers, version 3


corduroy slippers, originally uploaded by snickerdoodledays.

These lovelies came from a hand-me-down pair of men's corduroy pants. I finally managed to come up with a pattern that I'm happy with. Next up, tutorial!

Monday, November 30, 2009

Recipe of the Week: Bye-bye boxed pudding...

My kids call it chocolate custard, after one of the desserts in the Pokey Little Puppy story. Really, it's just chocolate pudding. Simple, delicious, easy chocolate pudding.


Did I mention that it's easy?


You'll need:

1/3 c. white sugar
1/3 c. cocoa powder
3 T. corn starch
a dash of salt
2 c. milk


First, combine all your dry ingredients, and then add the milk (in a microwave safe bowl).


Stir, stir, stir! (until smooth)


Also, try to have a tiny, stuffed dog in on the action-- that really helps.


Zap it!

Microwave on high for 3 minutes, then stir. Microwave for about 4 more minutes, or until thick, stirring after each additional minute.


It'll look a little leathery on top when it first comes out.


Fear not, intrepid microwavers...


...because after you whisk it, it'll be nice and glossy again.


(by the way, my bowl 'o puddin' is only sitting on the stove because

I have zero (zip, nil) counter space. Don't try to cook on the stove with a glass bowl.


Put some plastic wrap right down on the pudding. This keeps it from getting a "skin" (ewwww...) as it cools. Cool in the fridge for a bit. 30 minutes is what we prefer-- that gives us just warm pudding that won't burn the kiddies' mouths.


Top with a big, fat dollop of whipped cream, and enjoy!


Saturday, November 21, 2009

belated

The curse of the do-it-yourselfer strickes again: I want to make something meaningful, cute, and earth-friendly as a gift for someone I love-- in this case, my sister Erin. So I do.


Trouble is, it gets finished 4 months too late. Her birthday was in July.


Sorry Erin, will you ever forgive me?


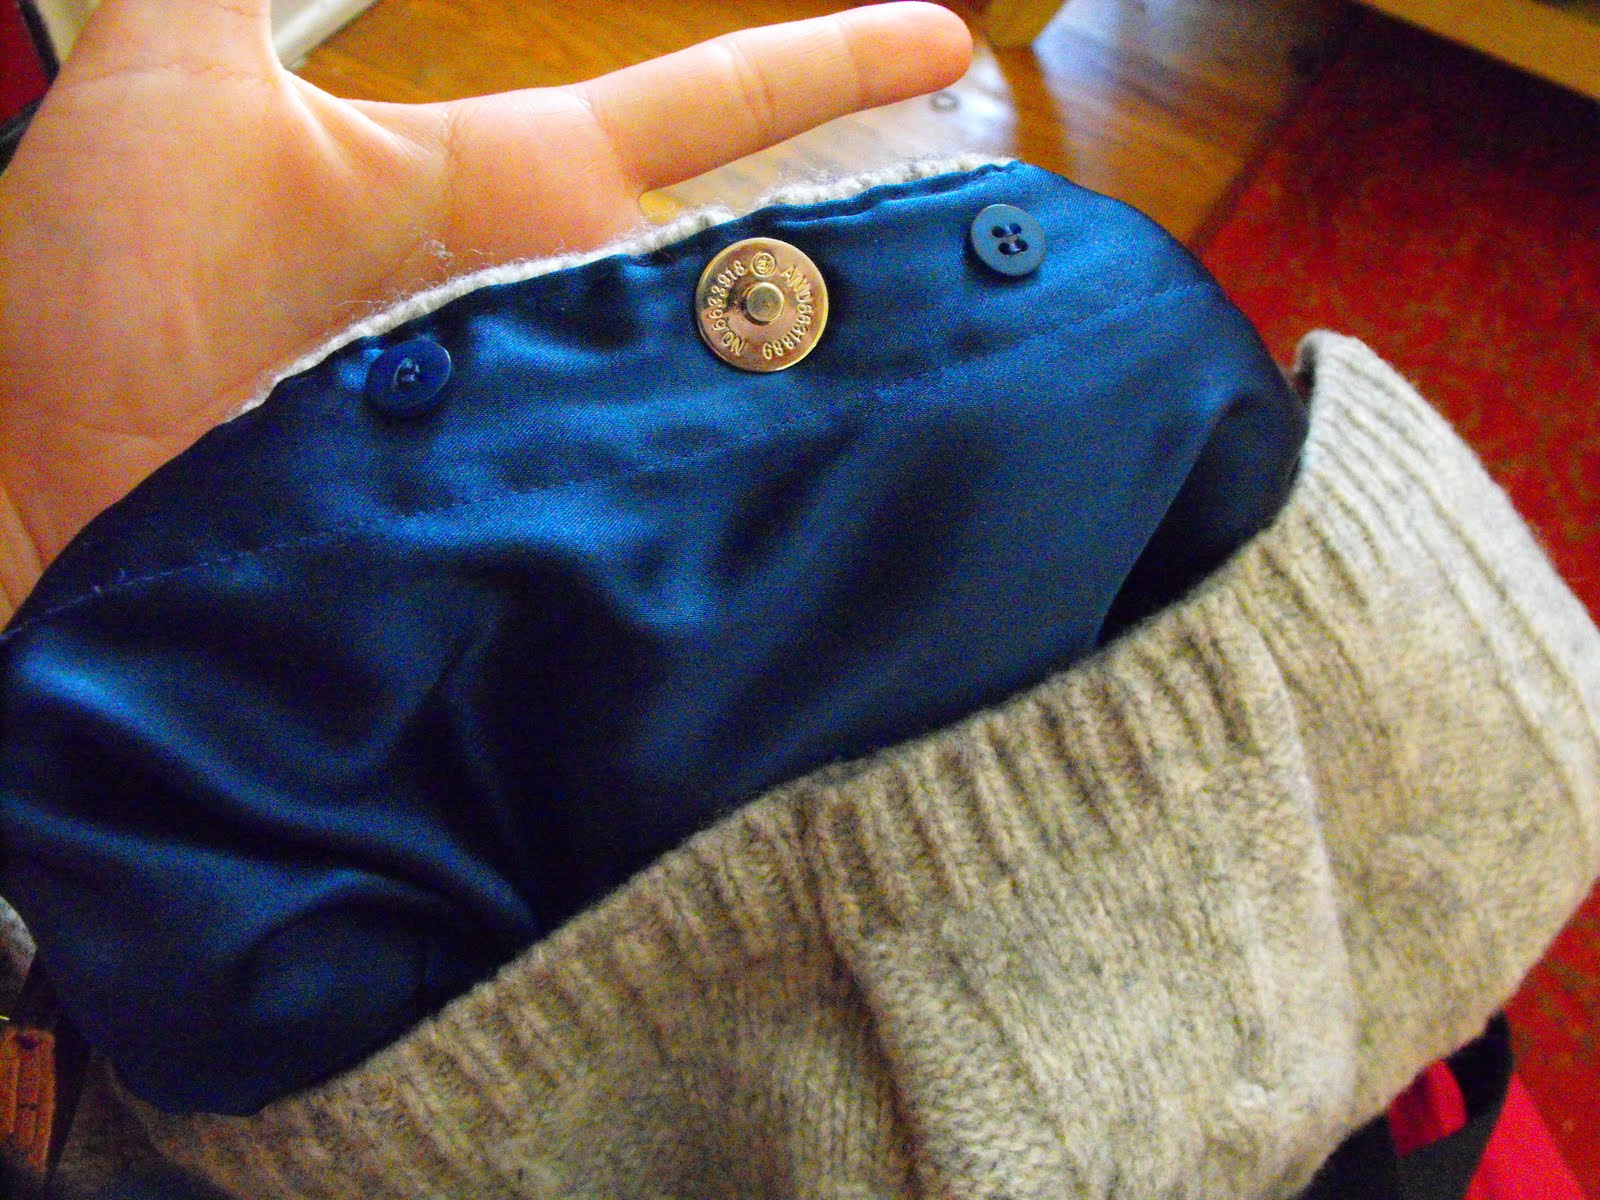
All the components for this bag came from the thrift store: a cable-knit sweater that I felted, a silky polyester blouse (for the lining), and a thick braided leather belt. Oh, and the magnetic snaps came from an old purse I've had for years and recently started cannibalizing for parts.


The hem of the sweater became the top edge of the purse. I left the buttons on the blouse-- thought they'd be a cute reminder of the origins of the purse.


Minor detail: I still need to take it to a shoe repair shop to have the strap sewn on. If you look closely at the second picture, you'll see a pin poking out. Yikes! I purchased leather needles for my sewing machine and got one in and ready to go, only to find that my presser foot won't lift high enough to get a few layers of sweater and leather in there. So, the the shoe repair shop we go...


But I'll have it done this week Sis. Cross my heart and hope to die.


Thursday, November 19, 2009

prototype

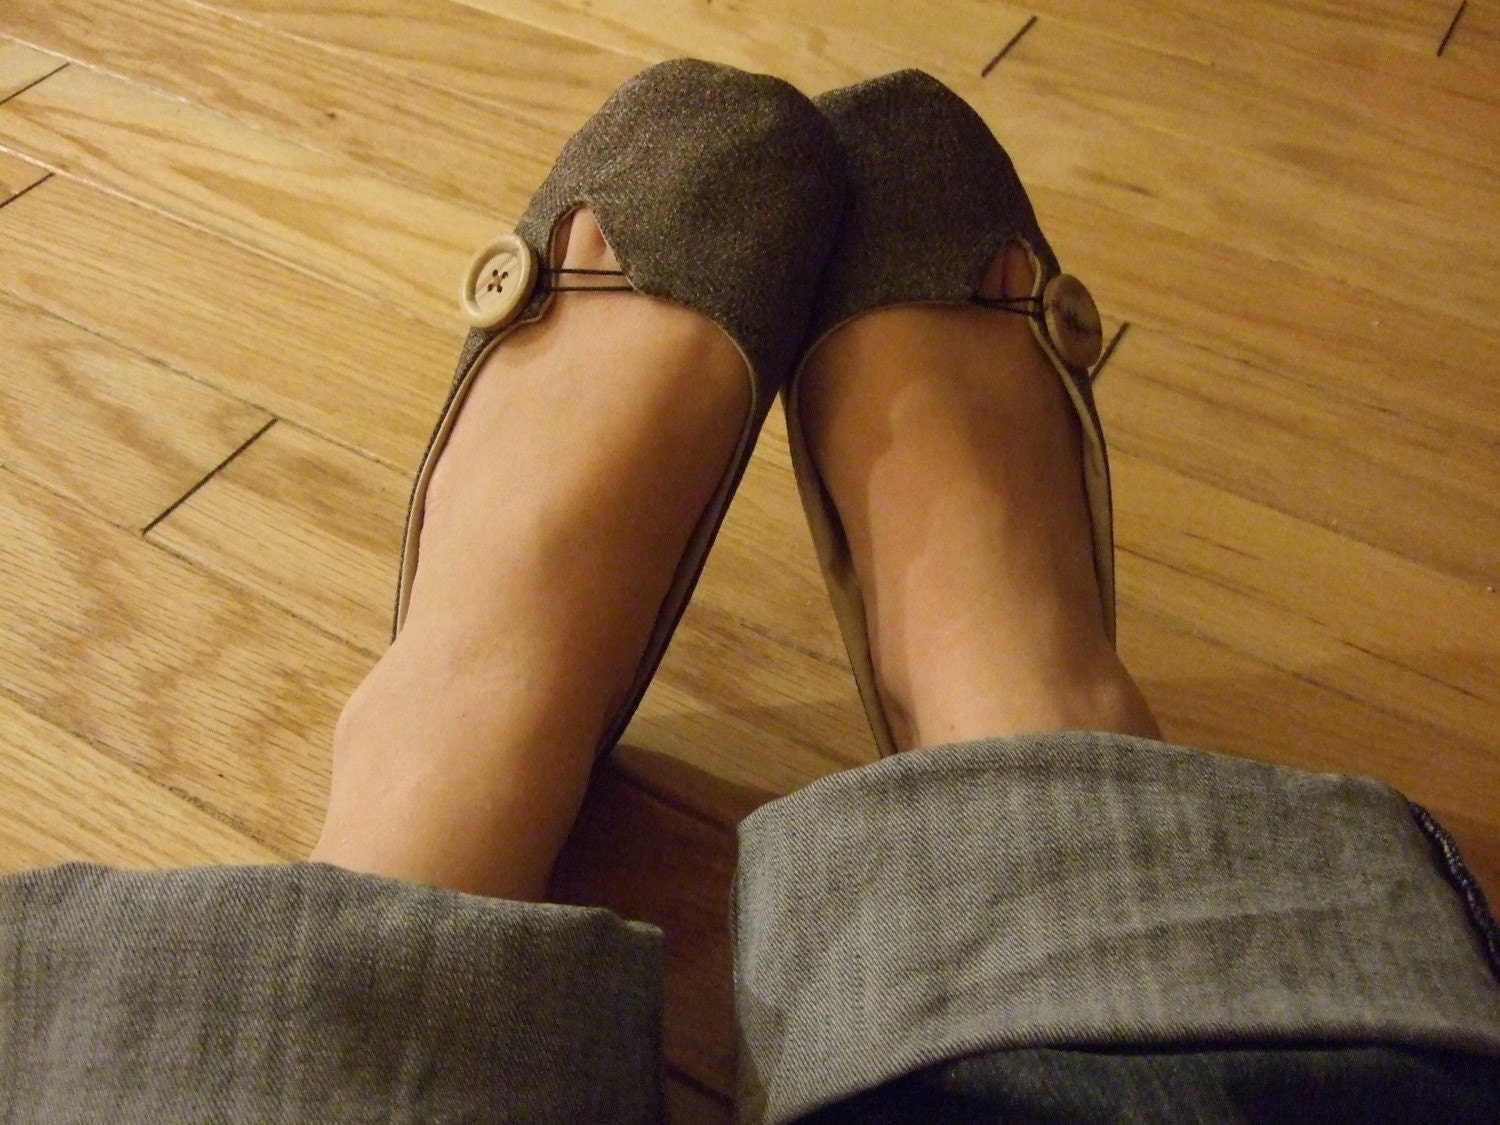
I've had my eyes on these slippers for a while now. Aren't they just lovely?


From Etsy's HydraHeart


I've been entertaining myself during baby Jack's 2 am nursings lately imagining how I'd make my own version. I didn't have cute wooden buttons, or black elastic, but I did have these:


A pair of soft black wool trousers that someone forgot were dry clean only. Can you see the lining peeking out the bottom? That cracks me up for some reason...

They were free to me. My mom runs a tiny little community thrift store and saved them for me because she knows I like felted wool.

Yeah, she's the best mom ever.

Anyways, here's my first try-- to test the pattern I made up:


I used two pieces of ribbon to tie my keyhole. Cute, no?

For version two, I'm going to do a few things differently:

*I won't include a seam allowance this time around-- the wool I used has just a little stretch to it and I want them tighter.

*I'll move the keyhole closer to the front of the slipper.

*If I feel really ambitious, I'll add a layer of interfacing-- to give them just a bit more structure

*I'll find something non-slip for my soles.


Stay tuned for take two...


P.S. My sincerest apologies for the filthy mirror. It belongs to baby Jack. He likes to lick it.

Wednesday, November 11, 2009

pink refashion

Back in early June I was in desperate need of a blouse to fit my 2 1/2 months postpartum body. I was so done with maternity clothes, but most of my regular clothes didn't fit yet, and I had a wedding to attend.

I found a pink men's dress shirt at my favorite thrift shop's semi annual 50% off sale-- they always have a lot of pink men's dress shirts for some reason.


Before


Anyways, I had a time crunch and no pattern (and, you can see, a sink full of dirty dishes), not to mention the fact that I was a bit hormonal-- a recipe for a fine sewing experience, don't you think?


I chopped off the sleeves (saving them for later) and took in the sides-- in an effort to get a somewhat more feminine fit. The acrobatics involved in trying to fit myself were probably very amusing. (side note: I recently ordered a kit for a My Twin Dress Forms-- I'll let you know how it goes)


half-way there!

I also unpicked the collar. Then I sewed up the new side seams and threw in a few haphazard darts. I re-attached the (now shortened) sleeves, and in the highlight of the entire project, learned how to use the rolled hem attachment on my sewing machine to finish the sleeve edges before attaching some lace trim (also thrifted).

The fit ended up being too wonky for me to be thrilled with the outcome, but I like it enough to wear it frequently-- even 5 months later.


after

(many thanks to my four year old photographer)


Cost: $2.50
Time: Way longer than it should have-- I worked here and there over the course of
two days.

Bountiful Baskets

Usually, when something sounds too good to be true, it is.

Usually, but not always.

At least not when it comes to saving crazy money on produce. I just paid $19.50 for all of this:


And next time it'll only cost $16.50. That's about $50 worth of produce there, folks!! I got corn, avocados, kiwis, tomatoes, cucumbers, apples, oranges, lettuce, spinach, oranges, a cantaloupe, and red onions. (I also had the option of buying bread-- at similarly great prices)

Crazy! Crazy, I tell you!

And because I like you so much, I'll share my secret: it's a food co-op called
Bountiful Baskets.

You pay your contribution ($19.50 your first time, and $16.50 after that) by Wednesday night, and then on Saturday morning you show up at your pick up point and get your produce. It's very well organized and totally awesome. They're able to get such insanely low prices because they have $0 overhead-- it's all run by volunteers.

Here's the catch: It's not available everywhere. Bountiful Baskets operates only in Arizona, Utah, Idaho and Washington-- check
their website for pick up points.

Monday, November 9, 2009

Recipe of the week: Ricotta Cheese

Mmmmm, ricotta...

Did you know you can make this yourself?

Did you know it's crazy easy to do?

I might be a little weird, but I get a big thrill out of making my own stuff-- stuff that most people assume you've got to buy: cleaning products, bread, jam, nutella, granola, yogurt, and now, ricotta cheese. I happen to like my versions of these things much more than store-bought, and I save a ton of money too!

Try this ricotta recipe and you'll never go back. (note: vinegar can be substituted for the lemon juice, and while the milk/cream combo is definitely the tastiest, you can use straight milk.)

Now go make some of these, or your maybe your favorite lasagna. (or both!)

Tuesday, November 3, 2009

more ruffles!

I turned these:
(a couple of shirts I rarely wear. One with a high, unflattering neckline, and the other with a big hole.)


Into this:
(a shirt that I can already tell I'll get a lot of use out of)

I used a shirt with a neckline that I like as a template for a new neckline on the off-white shirt, and then cut the white shirt (the one with the hole) into 2 inch wide strips. I sewed those strips into one 104" long strip, sewed a row of gathering stitches 1/5" in from each long edge. Then I gathered them up and sewed them on to the off-white shirt.

This was a little harder than my last ruffle shirt-- since the double gathered strip was a lot more fiddly to get looking nice. And my kids were distracting me when I was cutting the neckline (has the halloween sugar hangover and the time change been a double whammy for anybody else's kids?), so it's a little off center.

Oh well.

I think this is a big improvement over the originals, no?


Time: 1 1/2 hours
(but mostly because my kids were being needy. If you don't have any or they're sleeping or busy with something else, you could probably get it done in half the time-- and do a better job than I did!.)

Cost: FREE!!

Saturday, October 31, 2009

ruffle me happy

Ruffly shirt refashions have been all over the crafty blogosphere lately. Since I had the sewing machine out and warmed up from sewing Halloween costumes, I figured it was high time I had a whack at a ruffly tee of my own.

I'm definitely going to be making more of these lovelies.

This was the easiest shirt refashion I've done so far:

I started with two ill-fitting orange t-shirts. The first one got nipped in about a half inch on each side and I changed the round neckline to a V-neck.

I cut two 3" wide strips out of the second shirt, sewed them together, gathered them, and stitched them on to the first shirt. Voila!

Time: about 30 minutes
$$: FREE!! The shirts were hand-me-downs from a friend (thanks Shauna!)